Thursday, 29 January 2015

Python on Mac OS X

At CoderDojo on Saturday, quite a few children turned up with macs. For the Python groups, this meant the mentors spent quite a lot of time trying to fix the various Python installations and getting fairly basic stuff to work.

I love my mac, but the default Python setup is horrible for all but the most basic activities. Over the years I've managed to put together a procedure that fixes the Python environment so that most things (e.g. installing modules with pip) works as reliably as on a normal Linux platform.

There are many other/better ways to achieve the same goal. Using Homebrew works well, but does also involve installing Xcode.  My procedure, which minimises the need to install much else other than the latest Python version. Of course if you're going to use a Mac for any serious development, you'll almost want the Xcode command line tools as a minimum.  But I'm thinking of children who have maybe been loaned a Macbook by their parents, who won't want the SSD filled up with Xcode stuff they're never going to use.

I've tested this on Mountain Lion, Mavericks and Yosemite, but it should work on older versions of OS X.

All of these steps should be preformed using the Terminal.

1. First of all, remove the default Python that comes pre-installed on the Mac.

sudo rm -R /System/Library/Frameworks/Python.framework/Versions/2.7

2. Then download the latest version from python.org and run .pkg installer. That will plonk the new version in /Library/Frameworks/Python.framework/Versions/2.7. You can leave it there but I've found that it is better to move it to the same path under /System:

sudo mv /Library/Frameworks/Python.framework/Versions/2.7 /System/Library/Frameworks/Python.framework/Versions

3. then set the group permissions:

sudo chown -R root:wheel /System/Library/Frameworks/Python.framework/Versions/2.7

4. Now remove the obsolete simlinks:

sudo rm /System/Library/Frameworks/Python.framework/Versions/Current
sudo rm /usr/bin/pydoc
sudo rm /usr/bin/python
sudo rm /usr/bin/pythonw
sudo rm /usr/bin/python-config
sudo rm /usr/bin/easy-install

5. Then create new ones for the new version you've just installed:

sudo ln -s /System/Library/Frameworks/Python.framework/Versions/2.7 /System/Library/Frameworks/Python.framework/Versions/Current
sudo ln -s /System/Library/Frameworks/Python.framework/Versions/2.7/bin/pydoc /usr/bin/pydoc
sudo ln -s /System/Library/Frameworks/Python.framework/Versions/2.7/bin/python /usr/bin/python
sudo ln -s /System/Library/Frameworks/Python.framework/Versions/2.7/bin/pythonw /usr/bin/pythonw
sudo ln -s /System/Library/Frameworks/Python.framework/Versions/2.7/bin/python-config /usr/bin/python-config
sudo ln -s /System/Library/Frameworks/Python.framework/Versions/2.7/bin/easy_install /usr/bin/easy_install

6. Now, using your favourite text editor (e.g. nano), modify your  .bash_profile file to set up the correct path. Check carefully because the existing line may look very similar (only /System needs adding normally).  Make sure it has a section that looks like this:

# Setting PATH for Python 2.7
# The orginal version is saved in .bash_profile.pysave
PATH="/System/Library/Frameworks/Python.framework/Versions/2.7/bin:${PATH}"
export PATH

7.  Now we'll manually fix some absolute paths in a couple of files. Edit /usr/bin/easy_install
and on the very first line, change the path to include /System in the same way as we did to the path in bash_profile.  Then to ensure that idle works correctly, make an identical change to the same line in System/Library/Frameworks/Python.framework/Versions/2.7/bin/idle. You will need to use sudo with whichever editor you choose to edit these files. 

8. Now you can use easy_install to install pip and readline
sudo easy_install readline
sudo easy_install pip

That should be it! To test everything works, try installing a new Python module (e.g. the dateutil module is really useful);

sudo pi install python-dateutil

If this succeeds with no errors, fire up idle and check that you can run import dateutil successfully via the console.

Tuesday, 27 January 2015

Raspberry Pi CodeClub Week 2

I wanted to allow everyone to have plenty of time to get familiar with the Pis before embarking on any significant projects so my plan was to let the children continue exploring the Linux commands we started looking at last week. Also, I had 4 children who, for various reasons, had missed last week's session and for whom this week would be their first introduction to Raspberry Pi.

As I did last week, I showed everyone where the Pis, PSUs and cables were, and let them get everything connected themselves using the one page diagram as a guide. Even with my son and I helping, after about 10 minutes, only a couple of the children had their Pis up and running. Everyone else was still bumbling around and there were lots of pleas for help.

At this point I wondered whether my idea of having the children set up the Pis themselves every week was just stupid and I should simply get everything ready for them when they arrived.

However, after a few more minutes - and a little more help - everything seemed to go from chaos to order and suddenly there was a room full of working Pis. And, very satisfied and pleased children.

Once again Minecraft proved an obvious draw, with last week's veterans smugly showing the others how to build a castle using the Python script. There was also a lot of world hopping and I showed them how to discover their own IP address so that they could work out to whom the world they were connecting belonged.

I also enlisted one of the most able pupils to help me fix the problem with apt-get update. We talked about how proxy servers work and then I got him to configure his apt.conf file using nano (a task he performed perfectly). He then went on to install the updated packages and was pleased with his little piece of sysadmin action.

I have to say, of all the CodeClub sessions I've run, this was probably my favourite and the one I think I'm most pleased with. It was great to see everyone getting to grips with the Pis and the Linux operating environment. I loved it when one of the pupils asked another if the cable he was holding was the HDMI. "No," replied his friend confidently (and correctly), "That's the ethernet cable."

Raspberry Pis too complicated for use in Primary schools? Absolutely not.

Afterwards I drew up a list of all the different things we'd discussed or touched upon during the session:

  • Networking and IP addresses
  • Python
  • Proxy servers
  • The importance of keeping software up-to-date
  • The differences between wired and wifi networks
  • Linux vs Windows
  • HDMI
Not bad for a 45 minutes session. Now I'm not going to suggest that everyone is now an expert on these topics. But they have had an introduction, and one that was relevant to getting things done. They'll remember the stuff about IP addresses because it was useful to them in achieving something they wanted: working out which of the Steve's Worlds to connect to. 


Things to do differently next time?


It was great seeing everyone exploring what the Pis could do, so much so that I forget to stop the session in time for them to dismantle everything before the end. The computing suite was being used straight after the club so I had to hurriedly disconnect everything and move it out of the way before the next class arrived.

I was then left with a lovely spaghetti mess to disentangle:


Monday, 19 January 2015

MineCard Generator: see your name in blocks.

Ok, this whole project came about because we like to make cards for people. Christmas cards, birthday cards, new baby cards... you get the idea.

Over the last couple of years, whenever my sons have been asked what they think their friend would like as a theme for a birthday card, the answer has always been Minecraft. That's actually quite good news because a simple but cool picture for a card is the person's name created in Minecraft blocks.


Last year we ended up making loads of these and it got me thinking that there must be a way of automating the process using the Python API for Minecraft Pi Edition.  So we knocked up a simple script to allow the user to type in a name and a choice of block and then it would generate the block structure in Minecraft automagically. Working out the mechanics of creating each letter of the alphabet was a fun way to pass a wet Sunday afternoon. The result was a simple command line program that creates words in the Minecraft world (as long as they only contain the letters a-z).


I was quite happy with that but I couldn't help thinking that it should be possible to add even more automation: you still had to take the screenshot and then copy the resulting file off manually.

Then I got thinking about making some kind of web app...

So over the last few months I've been gradually putting all the elements together. Here's a high level design of how it works.


Using GoogleAppEngine as the web host, I have created a simple page where you can enter your text and select a block with which to build the letters. The service then uses xmpp to contact my Pi, which is running a listener and then uses the Minecraft API to create the message in blocks. After taking a screenshot and cropping appropriately, the final image is uploaded to DropBox (via the Python API) and the link passed back to the GoogleAppEngine service which displays it to the user.

Because I don't want to tie up a monitor permanently, it runs headless (although you have to start everything off with a monitor attached). However I want to be able to see what's going on so it displays some status information on the excellent Pimoroni Display-o-tron 3000. The white led bar across the bottom indicates the CPU load (running Minecraft all the time results in CPU load always being >70%) while the lcd portion of the dot3k lights up and displays the text and block choice of the latest message along with a count of the total number of requests that have been processed.


The complete operation takes about 60-90 seconds. this is mostly due to the time taken for the screenshot (the excellent Raspi2png is the only method of taking Pi screenshots I've found that actually captures the Minecraft window - most others only show a black rectangle) and then cropping out the window titlebar. I also check the message text for naughty words which adds an additional small delay.

Here is a movie of the whole shebang in operation. Or you can try it yourself here!


I think as a proof of concept it works quite well.  You could of course achieve the same functionality in lots of different ways, but I wanted to focus on easy-to-use services and tools that could be duplicated in an education environment for no cost. If you wanted to scale it better, it seems like a good project to implement using the Pi compute module.

Further work

  • Allow the user to select their own block type. 
  • Host the uploaded image directly in GAE rather than using DropBox
  • Add the ability to select different locations in the Minecraft world (with different scenary options)

Friday, 16 January 2015

Raspberry Pi CodeClub Week 1

Last term my Yr 5-6 (+ one Y4 bright spark) CodeClub tackled the awesome Technology Will Save Us DIY gamer project and really enjoyed the hardware programming. So much so, that that was the unanimous message when I asked them what they wanted to do this year. So obviously the first thing that comes to mind when I think about that type of project is Raspberry Pi.

When considering whether I could run a decent Pi-themed CodeClub I set the following objectives :
  • One Pi per student
  • Minimal use of step-by-step worksheets
  • Keep equipment costs down
  • Minimal disruption to school infrastructure and computing suite (mainly because everything has to be put back quickly at the end of a session).
The school has been really lucky to win a few Pis in competitions and I'd managed to snag a couple from various corporate events that I've been to over the last year. By adding in a couple from my own collection and nicking my son's (also won, from last year's poster competition) I now have enough so that I can run a club with 10 pupils all having access to their own dedicated Pi. I think this is really important as I felt that working in pairs with the Arduinos for the DIY Gamers sessions sometimes led to thumb-twiddling and a drifting of concentration.

I'd had a dry run of setting the Pis up before Xmas when I let my Yrs 3-4 club loose on a Pi Minecraft session in the final club of term. On that occasion I'd done a lot of initial setup prior to the children arriving (corralling the wired keyboards together and connecting the HDMI cables to the monitors) but today I did nothing in advance, and left them to gather the kit and figure things out themselves. They all got there in the end and it was great to see them all working together and helping each other out. The most common error was plugging the HDMI cable into the HDMI out socket on the back of the computer.

Worksheets

I felt that this cohort in particular had worked through a lot of worksheets last term and wanted to try to stay away from a very rigid 'working by numbers' approach.  I also wanted to leave the children to explore and investigate things themselves, something I didn't think the DIY Gamer project particularly encouraged.

So for week 1, I only had two handouts: One was a simple diagram of how to connect up the Pi which I'd used before...


...and the other was a list of useful Linux commands with some activities with which to test them out on the back.


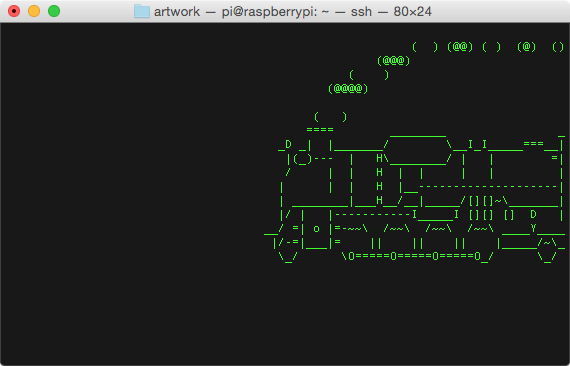
In support of this, I'd installed a few additional packages on the Pi images: fortune and sl (the latter produces an ascii art image of a steam engine that chugs across the screen). A fun surprise if you mis-type 'ls.


As I'd hoped, different children picked different commands to play with and investigate.  A common (understandable) mistake was to just type the command name in isolation without any arguments. Obviously this works with some commands (e.g. ls), may produce nothing with others (e.g. cd ) or 
just hangs the terminal (e.g. cat). By the end of the first session most were quite familiar with ^C.

The new Raspbian UI looks really good (especially with my custom wallpaper which has the school badge next to the Pi logo) and the kids liked messing around with the various things they found on the Desktop. Obviously Minecraft was a big attraction (distraction?), but I had a cunning plan: I'd already included a modified version of Raspberry Spy's excellent castle-building Python script on the SD card. In fact, things worked out perfectly because one of the children had been lurking at my pre-Xmas club when I'd showed this to the Yrs 3-4 group, and asked about it today.  They were all really impressed with the results and hopefully this has whetted their appetites for future sessions of Python vs Minecraft. 

Equipment

The school computing suite is very fortunate (thanks to fund-raising efforts of the PTA) to have some nice all-in-one PCs where the display and the computer are all a single unit. Some of the older ones don't  have an HDMI input, but enough do for my club. Although the networking is wifi, there are some old CAT5 sockets dotted around the room so I don't have to buy and  mess around with dongles. A lot of the machines in the suite have a Bluetooth keyboard and mouse (personally I find these really annoying as they're always needing new batteries or getting swapped around) but once again there are enough wired USB ones for me.

In addition to the 10 Pis, I have also cobbled together:
  • 10 4GB SD cards (all running the same starting image)
  • 10 HDMI cables
  • 10 CAT5 cables
  • 10 mini 170 hole breadboards
  • A few bags of assorted leds
  • A load of jumper wires
  • A collection of tactile switches
Most of the kit I acquired cheaply via eBay or Amazon. If you're willing to wait a few weeks for the items to come from China or Hong Kong then the prices are really good. In fact I'm still waiting for some buzzers and PIT sensors to arrive on the slow boat...

Things to do differently next time?


I thought I was saving paper by printing the command list and the sample tasks on a single, double-sided sheet of A4. However that just made it really awkward to have to flip the page over when referring to the command list to identify the appropriate command.  Next time I'll just have two separate sheets...

For some reason apt-get update didn't work (timed out) even though apt-get install did work. I think this is an issue with the school network proxy. I'll try to investigate for next week.

We were all having such a good time that I didn't keep a close enough eye on the time. So when the session ended I hadn't asked the children to dismantle everything and put it all back when they found it. Consequently I had to do it all myself at the end!

Plans for next week 

A bit more exploring the Pi environment then we'll start on some simple led lighting!

Thursday, 15 January 2015

Unicorn Hat progress meter for SD card cloning

Having the ability to clone 4 SD cards at once is great but I still find myself forgetting that I've started the process running in a background window and missing when the job completes and it is time to swap in another 4 for copying.  Sounds like a job for a Unicorn Hat!

So I made good on my threat to write a simple Python script to read the logfile generated by dcfldd and lighting up the leds as the cloning progresses. The leds change colour every time an 1/8th  of the total is completed and then start flashing bright white when the job is done.


Here's the script I used. The logfile is updated with a line like

[98% of 300Mb] 9488 blocks (296Mb) written. 00:00:00 remaining.

every time dcfldd finishes copying a block (of size set by the statusinterval argument).

import unicornhat as UH
import time
# light leds based on x,y grid
def lightem3(xin,yin,colour):
    for y in range(8):
        for x in range(yin):
                UH.set_pixel(x,y,colour[0],colour[1],colour[2])
    for y in range(xin):
        for x in range(yin+1):
                UH.set_pixel(x,y,colour[0],colour[1],colour[2])  
    UH.show()
#convert % to /164ths
def map_percent(p):
  p_grid = int(p/1.5625)
  y = int(p_grid/8)
  x = p_grid%8
    return x,y
#map colour gradient onto completed %ages
def colour_map(p):
    if p < 9:
        colour = (229,0,2)
    elif p < 17:
        colour = (216,131,40)
    elif p < 25:
        colour = (218,125,0)
    elif p < 33:
        colour = (212,185,0)
    elif p < 41:
        colour = (173,210,0)
    elif p < 49:
        colour = (110,200,0)
    elif p < 57:
        colour = (50,196,0)
    elif p < 99:
        colour = (0, 255, 0)
    elif p >= 99:
colour = (255,255,255)
    return colour
#main block
UH.off()
#initially all leds blue
for y in range(8):
  for x in range(8):
    UH.set_pixel(x,y,0,0,255)
    UH.show()
time.sleep(2)
line_prev = ''
while True:
        f=open('log_file','r')
        line = f.readline()
        if line != line_prev:
                print line
                line_prev = line
                fields = line.split()
                percent = fields[len(fields)-9][1:-1]
                print percent
                col = colour_map(int(int(percent)/1.5625))
                grids = map_percent(int(percent))
                lightem3(grids[0],grids[1],col) if percent:
    #flash white when complete
if int(percent) >= 99:
lightem3(8,7,(255,255,255))
UH.show()
time.sleep(0.3)
UH.off()
        time.sleep(0.5)

Thursday, 8 January 2015

Making your own SD Card clone army

This term I'm going to a few weeks of Raspberry Pi activities with my Yr 5-6 CodeClub. They all really enjoyed the physical computing aspects of the DIY Gamer project from last term and asked to do more hardware-related stuff.

Thanks to various donations and competition wins, and by raiding the family collection, I now have enough Pis for 10 children. I tested the school Computing Suite infrastructure with and end-of term Pi Minecraft edition session (with the younger CodeClub) before the holidays so I'm reasonable confident that I have everything I need.

I'd like the Pis to all run the latest Raspbian UI, but that will mean updating all the SD cards I burned in December. I could just lets the children do the update during the session, but to be honest, watching apt-get upgrade running is not that much fun or all that informative (I'll get them to perform some updates, but I don't want them to have to wait for a whole load of packages to install).

When I burned the cards before Xmas, I just used a single USB reader/writer, doing all 10 over the course of a few days using dd. Invariably it took longer than necessary because I'd leave one copying job running and then forget about it. It seemed like the whole process was ripe for automation, so I purchased a couple more cheap readers/writers from eBay and dug out my USB hub.


Because I have some full size SD cards and some micro SD cards (with adapters to allow use in model Bs), I have two reader/writers for each size of card.

The excellent enhanced version of dd -  dcfldd - allows you to create multiple output copies of whatever input you give it, and also has some extra options to monitor progress.  You can install it using

apt-get install dcfldd

 A few fairly un-scientifc tests suggested that performance was not significantly degraded by writing multiple copies: a 4 GB image file took  20 minutes when writing 4 copies (2 SD and 2 micro SD).  That means I can create a full set of 10 in under an hour!

It's very simple to run from the command line:

dcfldd if=ImageFileToBeCopied.img of=/dev/sda of=/dev/sdb of=/devsdc of=/dev/sdd sizeprobe=if

The 'sizeprobe' argument is optional but tells dcfldd to display a helpful percentage progress value which is quite helpful in seeing how far the copying has got and how much time remains.

Finally, because I'm toying with the idea of using my UnicornHat to display progress, I also wrote a simple Python wrapper to log events to a file.
import subprocess 
tool = subprocess.Popen(['dcfldd', 'if=CodeclubJan15.img', 'of=/dev/sdd','of=/dev/sdc', 'of=/dev/sdb', 'of=/dev/sda', 'statusinterval=4092', 'sizeprobe=if'], stderr=subprocess.PIPE) 
tee = subprocess.Popen(['tee', 'log_file'], stdin=tool.stderr) 
tool.stderr.close() 
tee.communicate()